MCP Setup Guide
Connect NexaLink to Claude
Run your digital business card and personal CRM by chat — edit your card, capture and organize contacts, and manage your team, right inside Claude. Setup takes about a minute.
https://nexalink.co/api/mcpOpen “Add custom connector” in Claude
In Claude (web or desktop), go to Settings → Connectors and click Add custom connector. In Claude for web you can also use the connectors menu inside any chat.
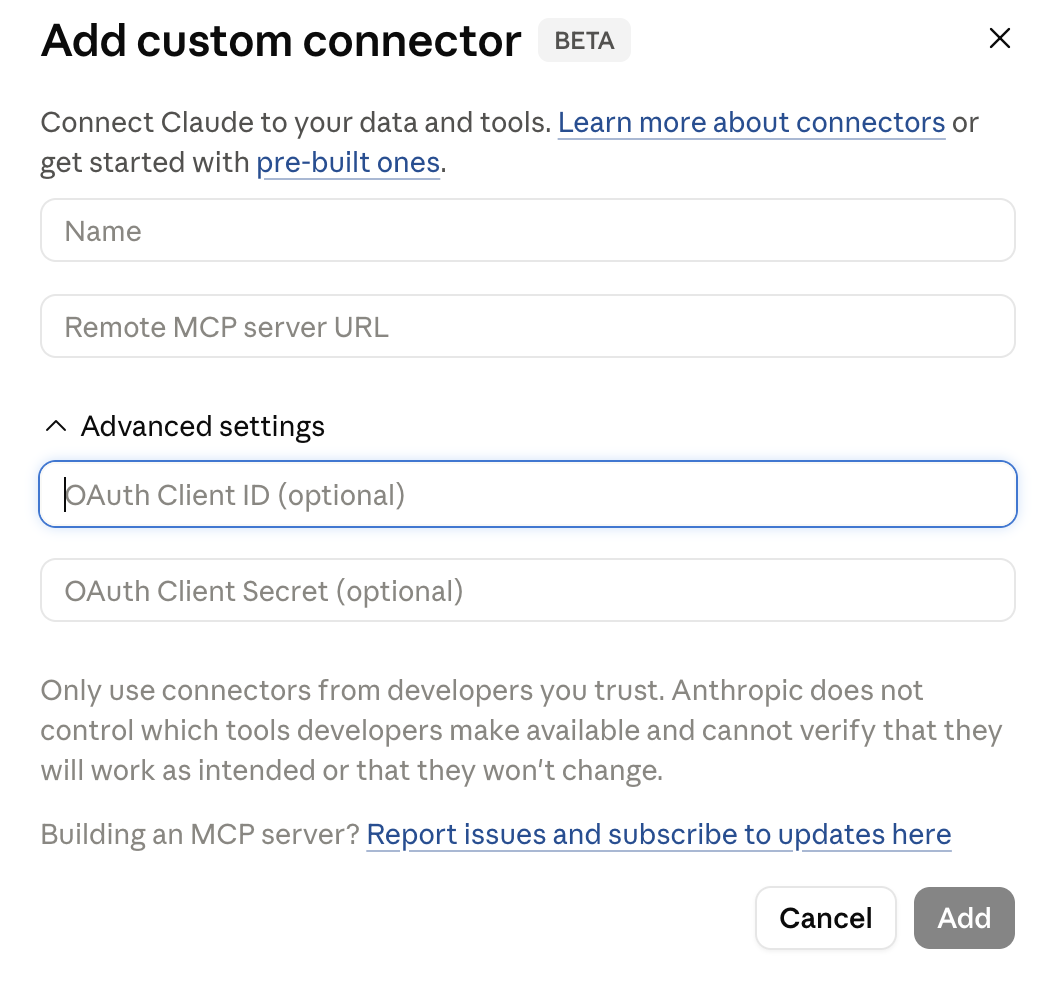
Paste the NexaLink server URL — leave the OAuth fields blank
Set Name to “NexaLink”, set Remote MCP server URL to https://nexalink.co/api/mcp, then open Advanced settings and leave OAuth Client ID and OAuth Client Secret EMPTY. NexaLink registers your client automatically (OAuth Dynamic Client Registration) — there are no credentials to create or paste. Click Add.
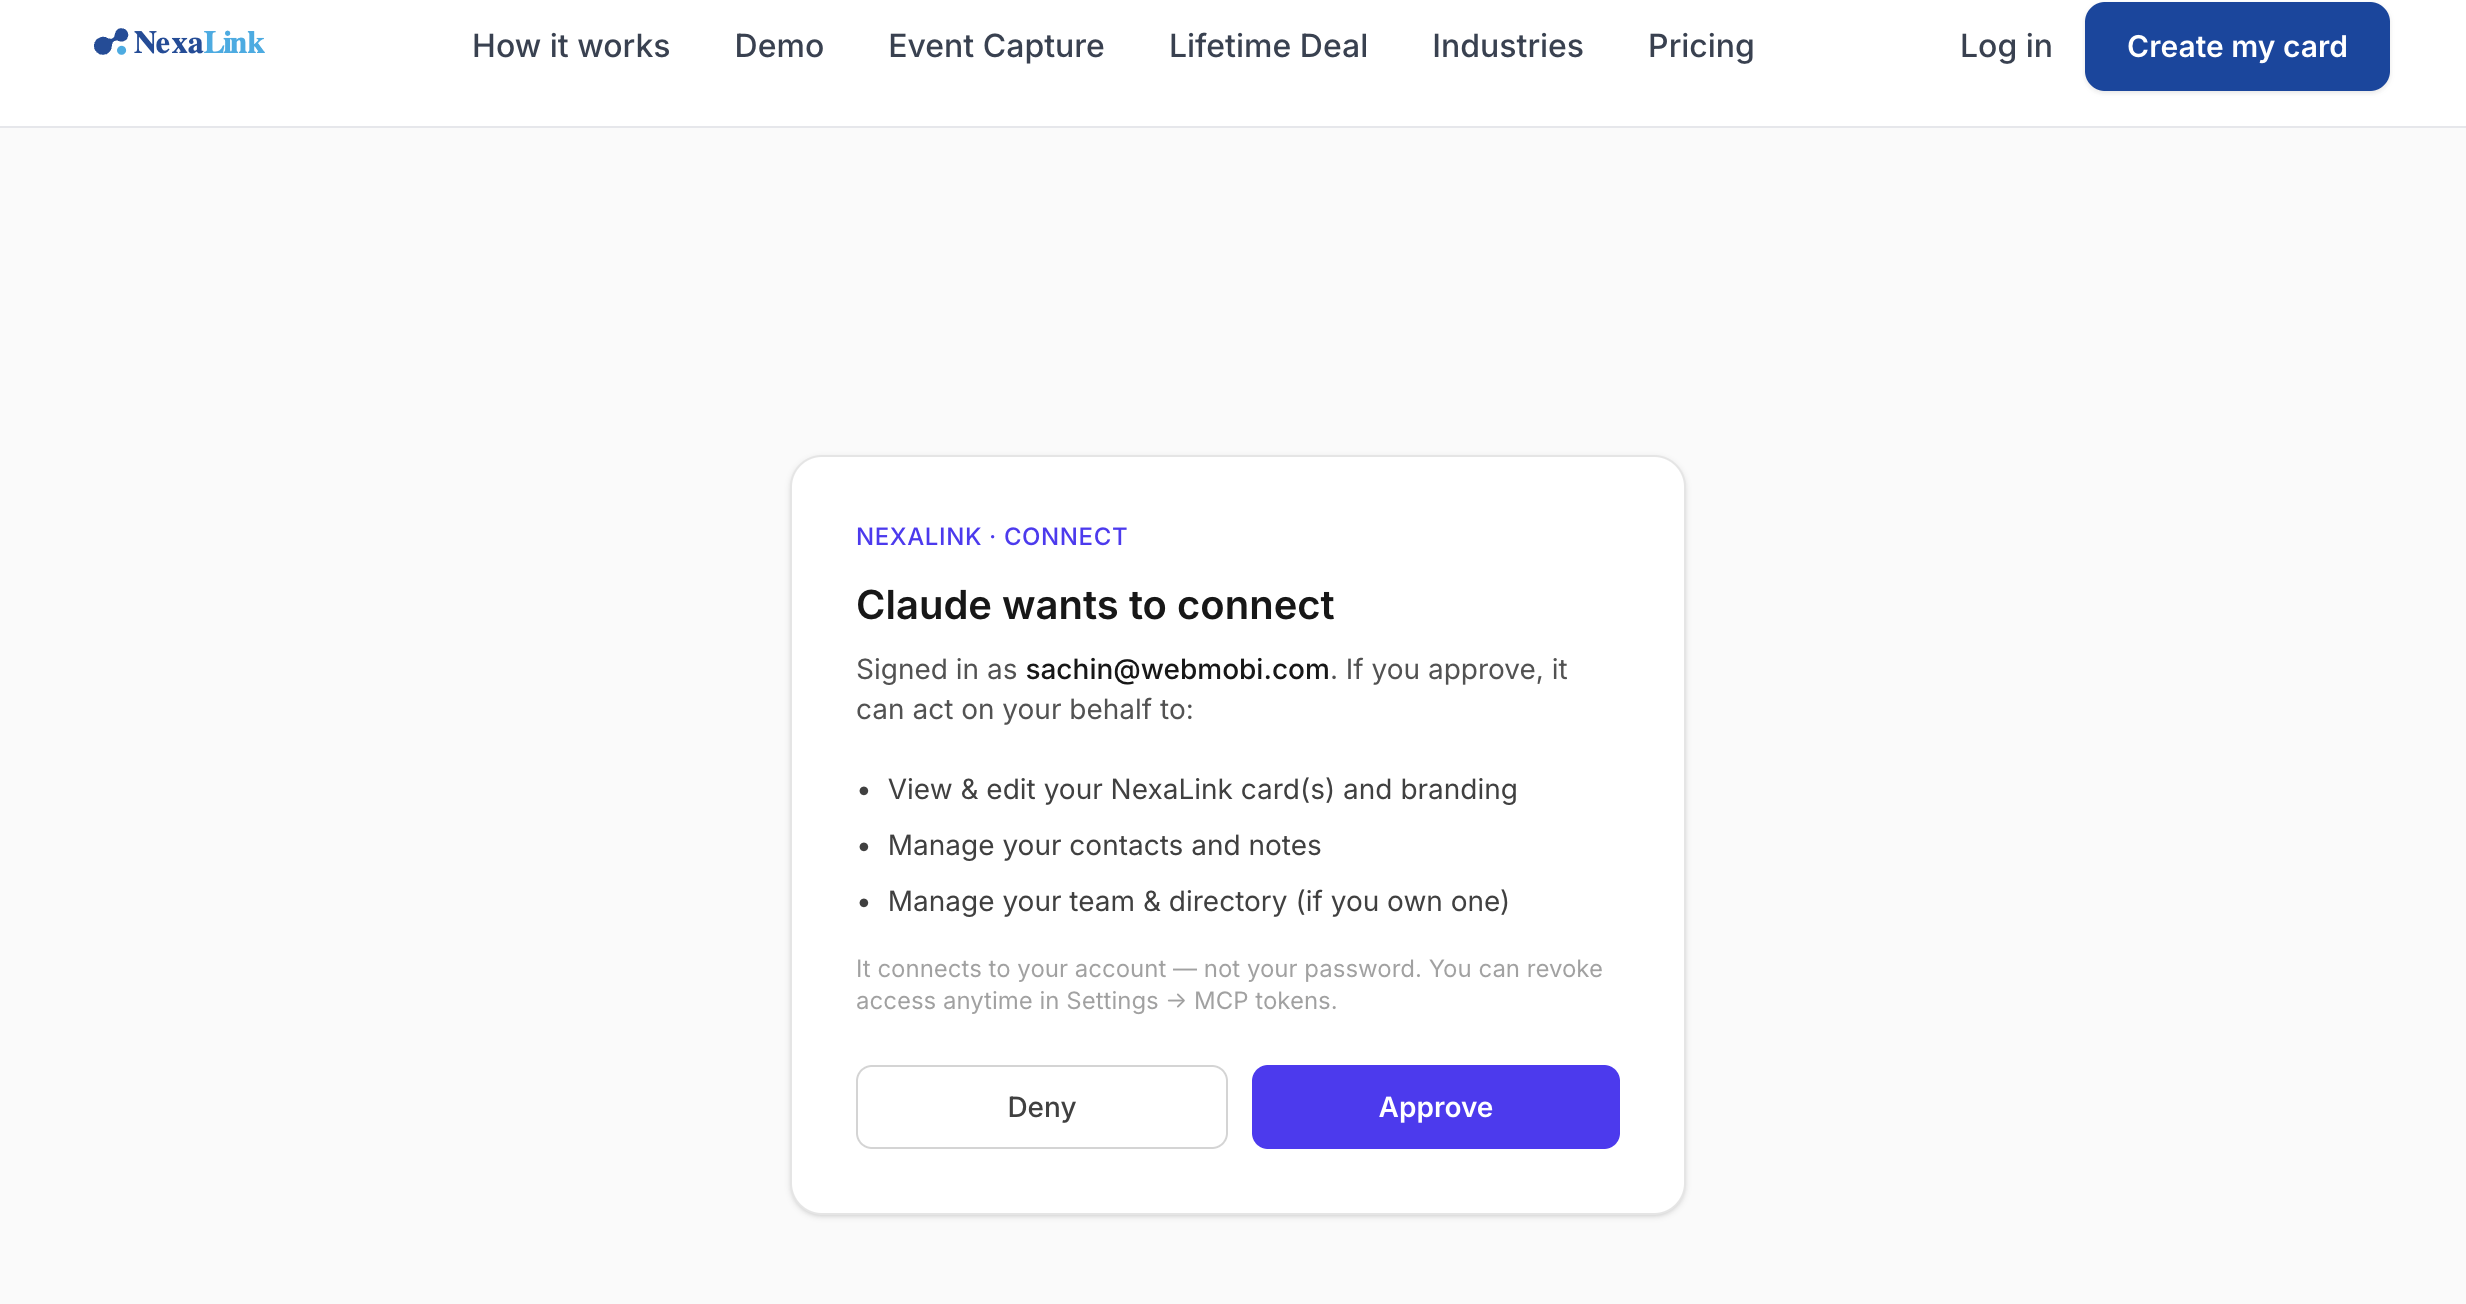
Sign in to NexaLink and approve
Claude opens a NexaLink page. Sign in with your NexaLink account (the same login you use for your card), review what the connector can do, and click Approve. It connects to your account — not your password — and you can revoke it anytime.
You’re connected — use it from any chat
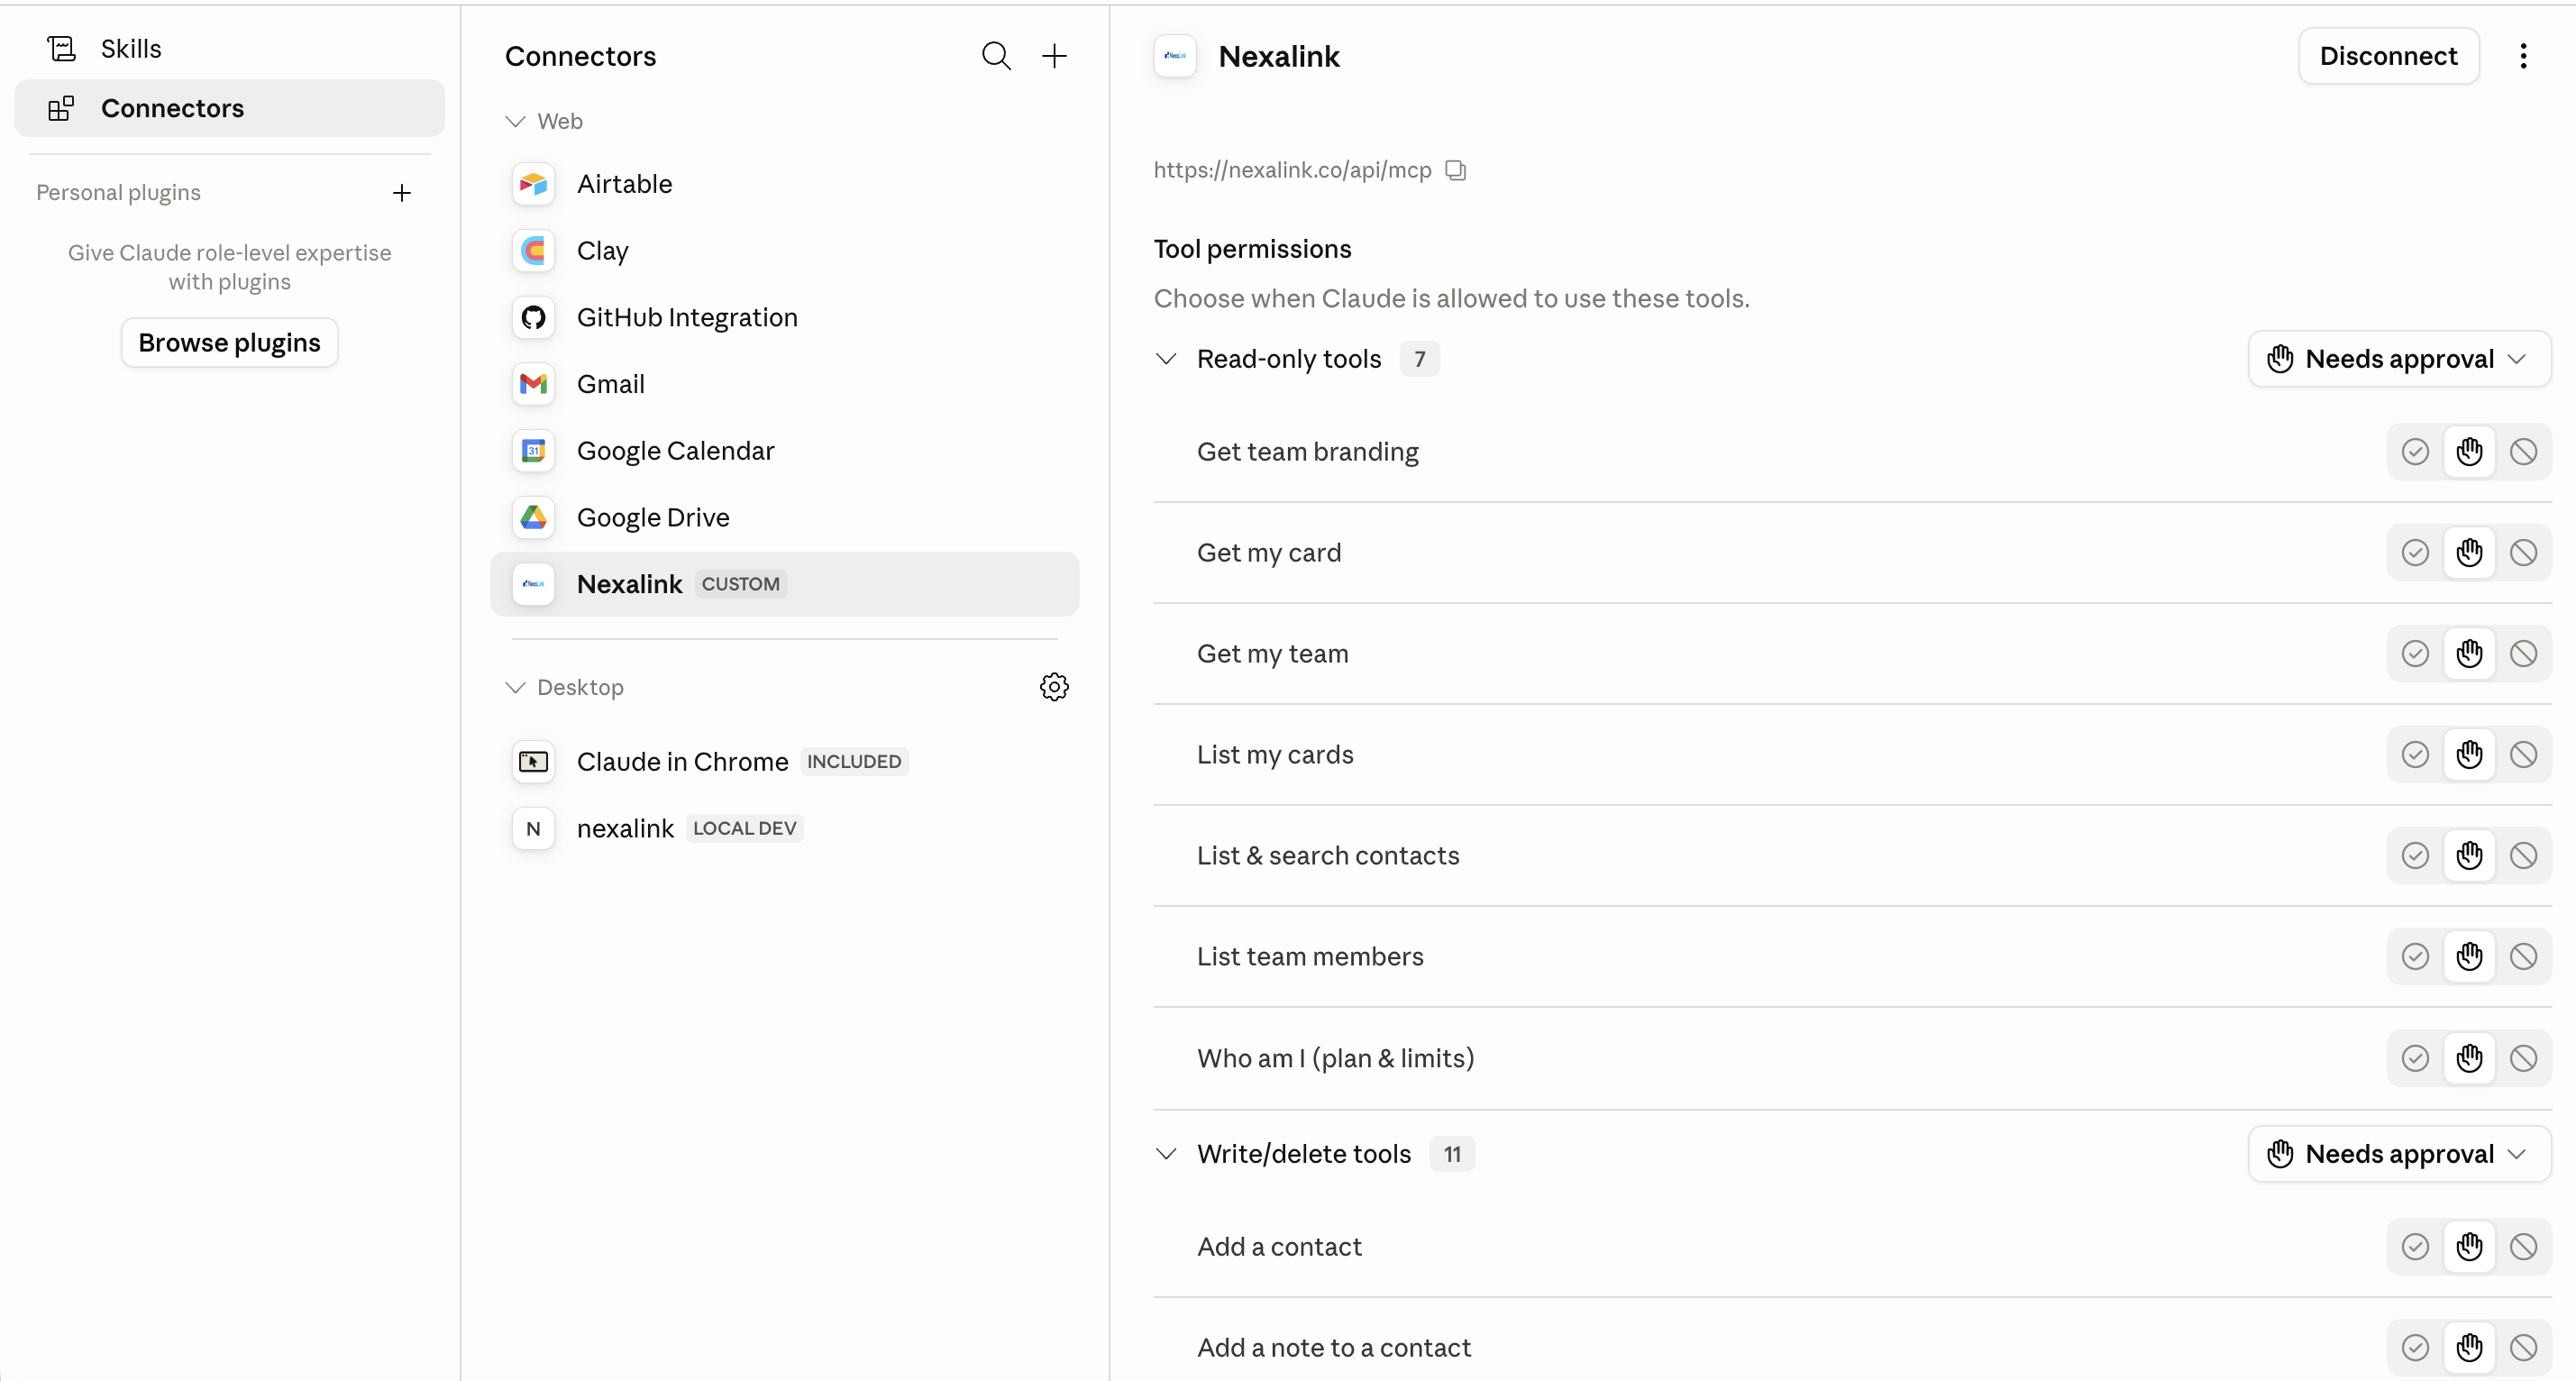
NexaLink now appears under Connectors as a CUSTOM connector with its 25 tools (13 read-only, 12 write/delete). Under Tool permissions you can choose, per tool, when Claude may use it — Always allow, Needs approval, or Never. Tip: set the read-only tools to Always allow and keep the write tools on Needs approval. Disconnect anytime from the same screen.
Try it
Once connected, just ask Claude in plain language. A few to start:
Claude Desktop, Cursor & other clients
If your client doesn't support remote connectors natively, bridge it with mcp-remote:
{
  "mcpServers": {
    "nexalink": {
      "command": "npx",
      "args": ["-y", "mcp-remote", "https://nexalink.co/api/mcp"]
    }
  }
}
Restart the client — a browser window opens for the same NexaLink sign-in and approval. Prefer a token instead of OAuth? Create one under Settings → MCP tokens and paste it as a bearer token.
Frequently asked
Do I need an OAuth Client ID or Client Secret?
No. Leave both Advanced-settings fields blank. NexaLink supports OAuth Dynamic Client Registration, so Claude registers itself automatically the first time you connect — there is nothing to create or paste.
What can the connector access?
Only your own account, and only the actions you could take yourself: viewing and editing your card and branding, reading and organizing your contacts and notes, and managing your team if you own one. It can never reach another user's data. You approve access on a NexaLink consent screen and can revoke it anytime from Settings → Connected apps.
Is it safe? Does it have my password?
It connects to your account over OAuth, not your password. Access tokens are short-lived and audience-bound, refresh tokens rotate with theft detection, and tokens are stored only as hashes. See our Security page for the full detail.
How do I use it in Claude Desktop or Cursor?
If your client doesn't support remote connectors natively, bridge it with mcp-remote: add an mcpServers entry that runs “npx -y mcp-remote https://nexalink.co/api/mcp”, then restart the client — a browser window opens for the same NexaLink sign-in and approval.
Which NexaLink account does it use?
Whichever account you sign in as during the approval step. Every tool acts strictly as that account and touches only its own data.
Want the security detail? Read our Security page.